
By Michael Nielsen, Publisher | 15+ Years in Diesel Repair
Last Updated: September 2026
⏱ Estimated reading time: 15+ minutes
An Eaton Fuller transmission is the backbone of the North American heavy-duty trucking industry. From the workhorse RT-series 10-speed to the 18-speed RTLO model and the modern UltraShift PLUS automated transmission, a Fuller unit powers everything from a long-haul dry van to a heavy-haul lowboy.
Its reputation for durability is well-earned — but even the most robust drivetrain hardware will develop a problem when pushed through a high-mileage service, operated with improper lubrication, or subjected to a poor shifting technique. When an Eaton Fuller transmission problem arises, quick and accurate diagnosis is the difference between a simple linkage adjustment and a complete transmission rebuild.
Michael Nielsen and Heavy Duty Journal's editorial team built this guide to cover the seven most common failure categories for both a manual-shift and automated Fuller transmission, walk through a systematic diagnostic process, and help you determine when a problem can be handled in-house versus when the transmission needs to come out of the truck.
Key Takeaways
- ✓Linkage before internals: the majority of a hard-shifting complaint on a manual Fuller transmission traces to a shift linkage issue — always test the linkage before diagnosing an internal mechanical failure.
- ✓Lubrication is the root of most problems: an incorrect oil type, a wrong oil level, or an extended drain interval are the leading contributors to overheating, gear noise, and bearing failure on a Fuller transmission.
- ✓Automated models require an electronic diagnosis: a UltraShift and AutoShift transmission communicates a fault through a Service Transmission light and a blink code — fault code retrieval is step 1 before any disassembly on these units.
- ✓Temperature is a warning system: normal operating temperature runs about 100°F above ambient; a sustained temperature above 250°F (120°C) causes oil breakdown and dramatically accelerates internal wear.
- ✓Slipout leads to jumpout leads to rebuild: addressing a gear slipout early prevents a progressive damage to a clutching tooth that ultimately forces a major internal repair.
In This Guide
- Eaton Fuller Transmission Models: Which Problems Apply to Your Unit
- The 7 Most Common Eaton Fuller Transmission Problems
- Step-by-Step Diagnostic Procedure for Eaton Fuller Transmissions
- Lubrication Requirements: The Most Overlooked Factor in Fuller Transmission Longevity
- DIY vs. Professional Shop: Where to Draw the Line
- Preventive Maintenance to Avoid Eaton Fuller Transmission Problems
- FMCSA Out-of-Service Criteria for Transmission Problems
- Frequently Asked Questions
Eaton Fuller Transmission Models: Which Problems Apply to Your Unit
Before diagnosing any Fuller transmission, confirm the model type. Eaton produces several distinct transmission families, and the diagnostic approach differs significantly between them.
A manual-shift transmission — including the RT, RTO, RTLO, and RTLOF series in a 9, 10, 13, 15, and 18-speed configuration — is a mechanical transmission using a twin countershaft and an air-operated range and splitter system for a multi-speed model. These units are built for durability and can be maintained and repaired by a competent diesel technician working from Eaton's service documentation. The troubleshooting approach is systematic and follows a defined flowchart based on symptom.
An automated transmission — the AutoShift, UltraShift, and UltraShift PLUS series — adds an electronic control layer. The Transmission Electronic Control Unit (TECU) manages a shift timing, clutch actuation, and fault monitoring. When these units develop a problem, diagnosis must begin with a fault code retrieval, not a mechanical inspection. Proceeding to disassembly before pulling a code wastes diagnostic time and risks a misdiagnosis.
Know your model designation. It's stamped on the serial tag on the transmission case. Eaton's model numbering indicates a gear count, torque rating, and configuration — information essential for ordering the correct part and referencing the right service documentation.
The 7 Most Common Eaton Fuller Transmission Problems
1. Hard Shifting and Gear Clashing
Hard shifting is the most frequently reported complaint on a manual Fuller transmission. The effort required to move the shift lever from one position to another should be consistent and moderate — when it becomes excessive, or when a gear clashes during engagement, the problem almost always starts with the shift linkage rather than inside the transmission itself.
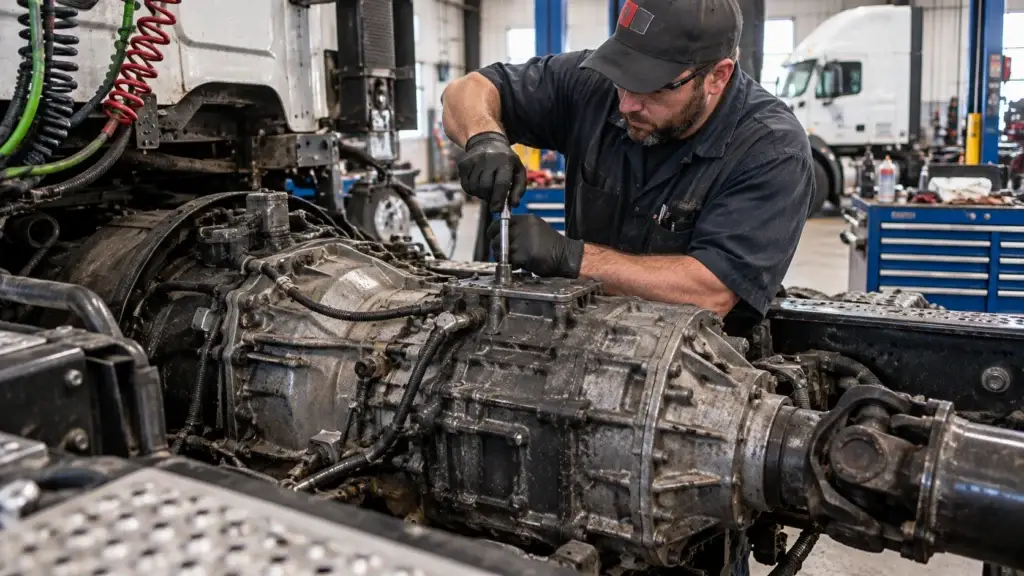
A linkage issue accounts for the majority of a hard-shifting complaint, particularly on a cabover-engine vehicle using a remote-type linkage. Per Eaton's service documentation, a linkage problem stems from a worn connection or bushing, a binding, an improper adjustment, a lack of lubrication on the joint, or an obstruction restricting free movement. The field test for this is straightforward: remove the shift lever or linkage from the top of the transmission and try moving the shift block manually using a pry bar or screwdriver.
If the yoke bar slides easily into each gear position, the problem is in the linkage assembly, not the transmission. If a yoke bar is difficult to move with the linkage removed, an internal cause typically includes a twisted mainshaft key, a bent shift yoke, a bowed mainshaft key, or a spline of the sliding clutch gear binding on the mainshaft. A cracked housing, a swollen yoke bar, or an over-stretched lockscrew can also cause a yoke bar to bind in its bore.
Gear clashing is a separate but related condition — it occurs when a driver attempts to engage a clutch gear before it has reached synchronization with the mainshaft gear. A light clashing does limited damage, but a repeated hard clash shift breaks a piece of metal from the end of a clutching tooth, which then circulates as contamination in the gear oil.
This is a training and technique issue as much as it's a mechanical one, and it's particularly important on an unsynchronized Fuller transmission where a proper double-clutching technique is essential.
2. Gear Slipout and Jumpout
A gear slipout occurs when a sliding clutch gear walks out of engagement while the gears are under load. When mating teeth are parallel and properly engaged, they stay meshed. When a clutching tooth is tapered or worn — typically from a gear clashing — the teeth try to separate as the gears rotate, and under the right condition, the gear slips out.
A common slipout cause documented in Eaton's troubleshooting guide includes: the transmission mounted eccentrically with the engine flywheel pilot, an excessive gear clashing that has shortened a clutching tooth, an incorrect adjustment of the remote shift control linkage resulting in partial engagement, a worn bushing and loose connection reducing engagement depth, and a weak or broken detent spring providing insufficient pressure on the detent ball. A long, heavy shift lever that swings pendulum-fashion on rough terrain can also overcome the detent spring tension and cause a slipout.
Jumpout is a related but distinct problem, typically occurring in the auxiliary section with the splitter gear set. If torque isn't sufficiently broken during a splitter shift — meaning the driver doesn't momentarily reduce throttle — the sliding clutch gear doesn't have enough time to complete the shift before torque is reapplied, and the partially engaged clutch gear jumps out of the splitter gear. Every jumpout event damages a clutching tooth on the mating gear, accelerating the wear that leads to a more frequent slipout.
Address a slipout early. A worn detent spring or a linkage adjustment often resolves the problem at minimal cost. If a clutching tooth is already tapered from chronic clashing, the affected gear set will need replacement.
3. Transmission Vibration
A vibration complaint is among the most frustrating to diagnose because many a vibration source sits outside the transmission itself. Before suspecting an internal transmission problem, the diagnostic process must rule out a worn universal joint, a driveline imbalance or misalignment, an unbalanced wheel or brake drum, a rough engine idle, a broken or worn engine mount, and a worn suspension component. HDJ's driveline vibration diagnosis guide covers this differential diagnosis in full depth.
A driveline angularity is particularly common on a truck that has had a fifth-wheel height adjustment, a suspension modification, or a component replacement. An unequal joint working angle creates a torsional vibration that transmits directly through the drivetrain. A loose or worn center bearing and a worn cross in a universal joint produce a vibration symptom that's easily misattributed to the transmission. Eaton's troubleshooting guide addresses driveline angularity specifically, with a procedure for measuring and correcting a working angle before opening the transmission.
A true transmission vibration typically involves a gear-induced noise accompanying the vibration, or a vibration that varies directly with transmission output speed, not engine speed. If the vibration remains at a consistent road speed regardless of gear selection, the source is almost certainly in the driveline, not the transmission.
⚠️ Safety Warning
Never perform a shift linkage test or transmission inspection while the truck engine is running. Before any under-cab or under-hood transmission work, chock the drive wheels, set the parking brake, and place the truck on level ground. A transmission gear oil may be extremely hot during and after operation — drain only after the oil has cooled sufficiently to prevent a burn.
4. Overheating
Per Eaton's service documentation, the transmission operating temperature should never exceed 250°F (120°C) for extended periods, though an intermittent spike to 300°F (149°C) won't harm the transmission. Under normal conditions, the transmission runs approximately 100°F (40°C) above ambient temperature — heat generated by gear and bearing friction is dissipated through the transmission case. When a condition prevents proper heat dissipation, oil breakdown accelerates and component life drops sharply.
Eaton identifies several primary causes of a transmission overheating. Improper lubrication — either the wrong oil type, an oil level too high or too low, or an operating angle exceeding 12 degrees — tops the list. Consistent operation under 20 MPH prevents adequate gear-splash lubrication and airflow.
A high engine RPM, a restricted airflow around the transmission case (common when the unit is "boxed in" by a frame rail, fuel tank, or mounting bracket), and an exhaust system routed too close to the transmission housing all contribute to heat buildup. A high-horsepower overdrive operation and coasting downhill with the clutch depressed are operational factors that heat the unit beyond a normal range.
For an application where overheating is a persistent problem — a high-horsepower engine with an overdrive transmission, a heavy GCW operation, or a sustained low-speed hauling — Eaton offers an external oil cooler kit that significantly increases heat rejection capacity.
5. Unusual Transmission Noises
A gear noise, a bearing noise, and a rattle are distinct from each other and point to a different failure mode. Understanding which type of noise is present — and when it occurs — narrows the diagnosis considerably.
A gear rattle at idle typically comes from a mainshaft gear rattle, not a gear failure. It often indicates a worn countershaft drive gear tooth or a loose mainshaft component and is aggravated by a rough engine idle. A howling sound that increases with road speed and changes with gear selection points to a gear tooth damage — brinelling (an impact mark on a bearing race or gear tooth) presents as a howl that progresses to a grinding in advanced deterioration.
A grinding during shift engagement points to a clutch release issue, a dragging clutch, or a severely worn clutching tooth. A bearing noise tends to be a consistent rumble or whine that correlates with shaft rotation speed rather than road speed.
An important distinction: many a noise diagnosed as a transmission problem is actually from a driveline component. An engine operating noise, a rough-idling engine, and a rear axle bearing failure can all present as an apparent transmission noise. Always isolate the noise source — does it change with engine speed, road speed, gear selection, or load? This three-factor matrix points the diagnosis in the right direction before any teardown.
6. External Oil Leaks
An oil leak is both a maintenance concern and a diagnostic warning sign. A lubricant leak that goes uncorrected can cause a catastrophic transmission failure when an oil level drops below the minimum threshold. Eaton's service documentation directs a technician to check for a leak first at a gasket surface, then at the input shaft, the rear seal, and, on an automated model, the transmission cooler circuit.
A typical leak location on a Fuller transmission includes the gasket surface at the rear housing, PTO cover, shift bar housing, shift tower, and clutch housing. A moist spot at a gasket is acceptable; an active drip or wet area requires repair. The rear seal is particularly important — an improperly installed or failed rear seal can cause a catastrophic failure if oil loss goes undetected. On an UltraShift HP model, the wet-clutch housing functions as a lubricant sump, making any leak in that area especially serious.
When diagnosing an apparent transmission leak, confirm that the leak is actually originating from the transmission. Oil blown back from the engine or from another component can accumulate on the transmission case and mimic a transmission leak. Trace the leak path to its true origin before replacing a seal or gasket.
7. UltraShift and AutoShift Electronic Faults
An automated Fuller transmission — AutoShift, UltraShift, and UltraShift PLUS — adds a layer of electronic complexity that requires a different diagnostic approach entirely. HDJ's automated manual transmission maintenance guide covers the full fleet-management picture for these units. These transmissions use the TECU to manage a shift decision, receive an input from multiple sensors (gear position, speed, rail select, ECA), and communicate a fault through the Service Transmission light.
When an automated Fuller develops a fault, the Service Transmission light illuminates and begins flashing a blink code. The two-digit code identifies the fault category. Fault Code 11 indicates an internal TECU failure — the engine may not crank, the transmission may not attempt to shift, and the truck may be stranded in gear. Fault Code 65 relates to the ECA speed sensor circuit and involves checking a wiring harness integrity at the speed sensor and 8-way ECA connector.
A common complaint on a high-mileage AutoShift unit is the transmission failing to engage any gear while the engine is running, despite shifting successfully with the engine off. This typically points to a clutch brake wear, a sensor fault, or a ground circuit issue.
Eaton recommends checking every ground connection — a frequent culprit on a high-mileage truck — before pursuing a more expensive repair. The ECM reset procedure (cycling the key OFF and ON a specified number of times) clears an active code and allows the TECU to perform a fresh self-diagnostic.
Step-by-Step Diagnostic Procedure for Eaton Fuller Transmissions
Effective diagnosis follows a defined sequence. Skipping a step — particularly the history gathering and external inspection phase — wastes time and risks a misdiagnosis. The following procedure aligns with Eaton's recommended troubleshooting approach for both a manual-shift and automated model.
Step 1: Gather Maintenance and Operational History
Before touching the truck, collect a maintenance history including lubrication procedures and drain intervals, a past failure or repair on this unit, a current mileage or hours, any recent change to vehicle configuration (GCW, spec change, driver change), and the exact complaint — when does it occur, under what load and speed condition, how long has it been happening.
On an automated transmission, determine whether the Service Transmission light is active and whether any fault code has been retrieved. A unit that has been operated with the wrong lubricant for 200,000 miles presents a completely different diagnosis picture than a unit that just began hard-shifting after a linkage adjustment.
Step 2: External Inspection
Check the oil level first — not just that oil is present, but that it's at the correct level. Per Eaton's documentation, the fact that you can reach oil with your finger doesn't mean it's at the proper level, and one inch of oil level difference represents a significant change in oil volume. Check the oil condition: a dark, gritty, or contaminated oil indicates a wear debris or overheating history.
Inspect every gasket surface and seal for a leak. On an automated model, also inspect air system integrity — an air system problem can prevent a shift mechanism from operating, particularly in cold weather when moisture in the system can freeze and block an air passage.
Step 3: Road Test and Symptom Isolation
A controlled road test before disassembly provides information no static inspection can replicate. Note: at what speed or gear does the problem occur? Is it consistent or intermittent? Does it change with load? For a vibration problem, does the vibration track with engine speed, road speed, or gear position?
For a shifting problem, is it hard to get into one specific gear or every gear? On an automated transmission, note any fault code display, a gear display reading (dash, CA, AN, GI indicator), or an unusual shift behavior during the test.
Step 4: Linkage Inspection and Test (Manual Transmissions)
For a hard-shifting complaint, the linkage test is mandatory before any internal diagnosis. Remove the shift lever or linkage from the top of the transmission. Using a pry bar or screwdriver, move the shift block into each gear position. If a yoke bar slides easily, the problem is the linkage assembly — inspect for a worn bushing, loose connection, binding, and lack of lubrication at a joint. Only proceed to an internal diagnosis if a yoke bar is difficult to move with the linkage disconnected.
Step 5: Fault Code Retrieval (Automated Transmissions)
On an AutoShift and UltraShift transmission, fault code retrieval is the first technical step — not an afterthought. Turn the ignition key to the ON position and observe the Service Transmission light for a blink sequence. An active code flashes immediately; an inactive code requires the key-cycle retrieval procedure specific to your model.
Use the SAE J1939 datalink protocol via a compatible diagnostic tool for more detailed fault information, as some FMI sub-codes are only retrievable electronically — HDJ's J1939 protocol basics guide explains how that data actually moves across the vehicle network.
Clear a code only after the fault has been corrected — clearing a code without repair simply resets the warning clock on an active problem.

250°F / 120°C
Maximum recommended sustained operating temperature for an Eaton Fuller transmission per Eaton's service documentation. Above this threshold, gear oil breaks down and component life drops sharply.
Lubrication Requirements: The Most Overlooked Factor in Fuller Transmission Longevity
More Eaton Fuller transmission is damaged by lubrication neglect than by any other single factor. This isn't a maintenance cliché — Eaton's service literature makes it explicit: if the oil isn't doing its job, or if the oil level is ignored, no other maintenance procedure will keep the transmission running or assure a long service life.
An Eaton Fuller transmission is designed so that an internal component operates in a bath of oil circulated by the motion of gears and shafts. There's no pump — lubrication depends entirely on gear splash at operating speed. This makes an oil type and level critical in a way a pressurized lubrication system isn't. Too little oil means a component emerges from the bath partially or not at all.
Too much oil causes a churning, generates heat, and can force oil past a seal. The correct level is oil at the filler opening — verify by feel and visual check, not just by reaching a finger into the hole.
Eaton's current heavy-duty lubricant specification is PS-386, which replaced the older E-500 (PS-164 rev 7) specification effective January 1, 2017. A lubricant meeting the older PS-164 rev 7 spec can still be mixed with a PS-386 product for a top-off, but warranty coverage on a current-production transmission requires PS-386.
Using a non-approved lubricant voids warranty coverage and can affect transmission performance — Eaton maintains a published list of an approved Roadranger lubricant for reference. A synthetic lubricant meeting the PS-386 specification is what supports an extended drain interval on an on-highway application; for an off-highway application — a coal truck, mining vehicle, vocational unit — a drain interval shortens significantly regardless of lubricant type.
On an UltraShift HP model, the wet-clutch housing requires a separate lubricant fill distinct from the main gearbox. This is a common error during service: a technician fills the main gearbox correctly but neglects the clutch housing sump. Always perform the idle stabilization procedure — allowing the engine to idle for five minutes after filling, then rechecking level — before returning an UltraShift HP to service, and verify the exact fill quantity against your specific model's service documentation since it varies by operating inclination.
A drain interval also matters. Eaton's transmission filter should be changed at a regular lube service interval. For an automated transmission, a filter inspection at every PM check for damage or corrosion is required — a blocked filter on these units starves the lubrication system in a way a manual transmission, which has no filter, isn't vulnerable to.
DIY vs. Professional Shop: Where to Draw the Line
Not every Fuller transmission problem requires a rebuild or a specialized shop. Understanding which repair is within the scope of a capable fleet technician — and which requires a transmission specialist — avoids both an expensive misdiagnosis and an unnecessary teardown.
A repair a well-equipped fleet shop can handle includes: a shift linkage inspection, adjustment, and bushing replacement; an oil level correction and fluid change; an external seal and gasket replacement (input shaft seal, rear seal, PTO cover gasket); an air system inspection and air line repair on a range/splitter-equipped transmission; a fault code retrieval and basic sensor replacement on an automated model (speed sensor, harness inspection); and a detent spring replacement.
HDJ's clutch replacement procedure guide and diesel scan tool buyer's guide cover two of the more involved jobs on that list in full depth.
A repair that typically requires a specialized transmission shop or a complete pull-out includes: an internal gear and shaft replacement, a countershaft removal and inspection, a bearing replacement requiring a specialized puller and press, a timing adjustment on a twin-countershaft configuration (a critical procedure requiring gear-marking and precise meshing), a clutch housing repair or replacement, and a TECU replacement on an automated model requiring ECU programming.
A transmission alignment inspection also requires precision measurement equipment — a flywheel housing face and pilot runout measurement uses a dial indicator and requires a specific procedure outlined in Eaton's service manual.
For a fleet manager evaluating repair versus replacement, the ATRI annual operational cost analysis provides current data on a component repair cost as a percentage of total vehicle operating cost — useful for establishing a repair/replace threshold in fleet maintenance policy.
Preventive Maintenance to Avoid Eaton Fuller Transmission Problems
The best Eaton Fuller transmission repair is the one you never need. A consistent preventive maintenance schedule addresses the leading cause of a Fuller transmission failure before it develops into a costly repair.
A daily check should include a visual inspection for an oil leak under the transmission and a quick assessment of shifting quality — a driver is the first line of detection for an emerging shift problem, and any complaint of a hard shifting, gear slipout, or unusual noise should be documented and investigated, not dismissed. Per 49 CFR Part 396, a vehicle inspection requirement mandates that any defect affecting safe vehicle operation — including a drivetrain issue — be identified and corrected before the vehicle returns to service.
At every PM service, inspect an oil level and condition, check for an external leak at every gasket surface and seal, inspect an air system component (air dryer, governor, and a line serving the range and splitter valve), and examine a shift linkage for wear, looseness, or lack of lubrication. The CVSA's out-of-service criteria include a specific condition related to drivetrain integrity — knowing these criteria helps a fleet manager prioritize a transmission repair that directly affects roadside compliance.
An oil change on a manual Fuller transmission in on-highway service using an approved PS-386 synthetic lubricant can extend to 500,000 miles on a properly maintained Fuller Advantage unit. However, this extended interval doesn't eliminate the requirement to check oil level and condition at regular intervals. For an automated transmission, Eaton's documentation calls for more frequent PM attention due to the filter maintenance requirement and the critical nature of the wet-clutch lubrication system on an HP model.
Driver training is a maintenance tool that's consistently undervalued in a fleet operation. A proper double-clutching technique on an unsynchronized manual transmission directly reduces gear clashing and extends clutching tooth life. Breaking torque cleanly before a splitter shift prevents a jumpout. These are teachable techniques, and a fleet that invests in driver training on Fuller transmission operation sees a measurable reduction in gear and synchronizer wear. The Technology & Maintenance Council (TMC) Recommended Practices include guidance on a drivetrain training program worth reviewing for fleet standardization.
Fuller Transmission PM Schedule at a Glance
Use this as a baseline — always refer to your specific model's service documentation for interval specifications:
- Daily: Leak inspection, driver defect report review
- Every PM service: Oil level check, linkage inspection, air system check, leak inspection at all gaskets and seals
- Every oil change: Drain while warm, inspect oil for contamination or metal particles, replace filter (automated models), refill with approved lubricant to correct level
- As-needed: Linkage bushing replacement, detent spring inspection, air line replacement
- At symptom onset: Linkage test before any internal diagnosis, fault code retrieval on automated models before disassembly

FMCSA Out-of-Service Criteria for Transmission Problems
Not every Fuller transmission problem is just a maintenance issue — some conditions place a commercial motor vehicle out of service under a federal regulation, with a legal and operational consequence for the carrier. Understanding which transmission symptom crosses the OOS threshold is essential for a fleet manager making a go/no-go decision.
Under 49 CFR Part 393, a vehicle must have every part and accessory in a safe and proper operating condition. The CVSA North American Standard Inspection Program uses a specific criteria to determine when a drivetrain condition warrants placing a vehicle out of service at roadside.
A condition that typically results in OOS includes any condition that renders the transmission unable to remain in a selected gear under a normal operating load, a severe gear slipout that prevents the driver from maintaining control, and any lubricant leak severe enough to create a fire hazard or road contamination hazard.
The practical implication for a fleet manager: if a driver reports that a transmission is jumping out of gear, that truck shouldn't be dispatched until the cause is identified and corrected. A gear slipout that occurs under load is both an FMCSA compliance issue and a direct safety risk. Document the defect report, the corrective action, and the return-to-service authorization per FMCSA's driver vehicle inspection report requirements.
Frequently Asked Questions
What are the most common Eaton Fuller transmission problems?
The most common issues are hard shifting or gear clashing, gear slipout and jumpout, vibration, overheating, an unusual noise (grinding, howling, rattling), an external oil leak, and, on an automated model, an electronic fault code related to a sensor, solenoid, or the TECU. Most manual-shift problems trace back to one of three root causes: improper lubrication, a worn or maladjusted shift linkage, or a clutching technique issue.
What type of oil does an Eaton Fuller transmission require?
A current-production Eaton Fuller manual transmission requires a gear oil meeting the Eaton PS-386 specification, which replaced the older E-500 (PS-164 rev 7) spec effective January 1, 2017. Using the wrong lubricant — or running oil at the wrong level — is one of the leading causes of overheating and accelerated wear. An automated model such as an UltraShift HP has an additional requirement: a separate lubricant fill for the wet-clutch housing. Always verify the correct lubricant against your specific transmission model's service documentation.
How do I diagnose hard shifting on an Eaton Fuller transmission?
Start by inspecting the shift linkage before assuming an internal transmission failure. Remove the shift lever from the top of the transmission and try moving the shift block with a pry bar or screwdriver. If a yoke bar slides easily, the problem is in the linkage — check for a worn bushing, loose connection, or binding. If a yoke bar is difficult to move, the internal cause is typically a twisted mainshaft key, bent shift yoke, or cracked housing.
What causes gear slipout on an Eaton Fuller transmission?
A gear slipout occurs when a sliding clutch gear "walks" out of engagement while the gears rotate. The most common cause is a tapered or worn clutching tooth (often from excessive gear clashing), an incorrect adjustment of the remote shift control linkage, an insufficient detent spring pressure, and a transmission-to-engine misalignment. A vibration from an improperly aligned driveline can also contribute. Addressing a slipout early is critical — continued operation accelerates wear on a clutching tooth and can lead to a jumpout and a more expensive internal repair.
What is the maximum safe operating temperature for an Eaton Fuller transmission?
Per Eaton's service documentation, the transmission operating temperature shouldn't exceed 250°F (120°C) for extended periods, though a brief spike to 300°F (149°C) won't cause harm. Normal operating temperature runs roughly 100°F (40°C) above ambient. A common cause of overheating includes a low oil level, a wrong lubricant type, a sustained operation under 20 MPH, a restricted airflow around the transmission case, and a high-horsepower overdrive operation. An external oil cooler kit is available for a high-heat application.
How do I retrieve a fault code on an Eaton Fuller UltraShift or AutoShift transmission?
An Eaton UltraShift and AutoShift transmission uses a Service Transmission light to communicate a fault code via a blink sequence — an active code flashes as a two-digit pattern when the ignition key is turned on. Precise key-cycle read and clear procedures vary by model, so refer to your specific transmission's troubleshooting guide. Fault Code 11 indicates a TECU internal failure; Fault Code 65 typically relates to the ECA speed sensor circuit.
Eaton Fuller transmission problems are, in most cases, diagnosable and preventable with the right approach. Start with the basics: verify lubrication, inspect the linkage before assuming internal failure, and on an automated unit, pull a fault code before picking up any tools.
The systematic diagnostic process outlined in Eaton's service documentation exists because it works — the same discipline Michael Nielsen and Heavy Duty Journal's editorial team hold every guide on heavydutyjournal.com to. For a fleet manager, the investment in proper maintenance intervals, driver training, and early defect reporting pays dividends in transmission life that far exceed the cost of the maintenance itself.
Help a Fellow Tech or Fleet Manager
If this guide helped you diagnose or prevent a Fuller transmission problem, share it with your shop team or fleet maintenance contacts. Practical drivetrain knowledge saves trucks and keeps drivers moving.